


Gardens are places of tranquility, beauty, and self-expression. Adding stepping stone mosaics is a perfect way to personalize your outdoor space while creating functional pathways. These colorful and unique pieces of art can be designed to reflect your personality and complement your garden's aesthetic. Here’s a step-by-step guide to help you create your own mosaic stepping stones.


Materials:
Plain stepping stone - Found in garden centres
Mosaic tiles, glass pieces, or broken ceramics
Fibreglass mesh
Clear plastic sheet offcut - or heavy duty clingfilm
Tile nippers
Quick grab glue
Tile adhesive
Grout
Rubber gloves
Sponge and clean water
Sealer
Step 1: Plan Your Design
Before diving in, decide on a design for your stepping stone. It could be something as simple as abstract patterns or as detailed as flowers, animals, or geometric shapes. Sketch your idea on paper first to visualize it.
Tip: If you're new to mosaics, start with a basic design. You can always create more intricate designs as you gain confidence.
Step 2: Create your mosaic design.
Sketch your design on paper or print out a design from online. Lay your design on the the table surface you'll be working on and secure it with some tape. Place a piece of clear plastic sheeting or heavy duty clingfilm over the top of your image/template making sure the it's bigger than your design and secure the plastic to the table with a tape.
Step 3: Preparing the fibreglass mesh for your mosaic art
Cut the fibreglass mesh to the size of the top of your stepping stone. Lay the mesh over the top of the clingfilm in line with your design and secure with a small piece of tape, ready for tile placement.
Step 4: Arranging and adhering the tiles onto the fibreglass mesh
Apply a thin layer of adhesive onto each piece of tesserae. Carefully place each tile onto the mesh in your desired place, following your design layout. Use tile nippers to trim tiles as needed for precise fitting and continue until your mosaic design is complete.
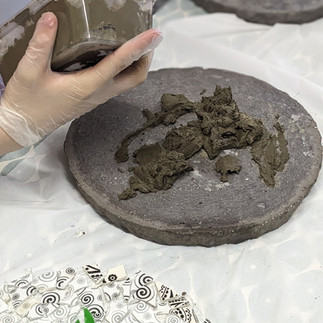
Step 5: Connecting your completed mosaic onto your concrete stepping stone
Mix your tile adhesive (thinset) and spread a layer over the top surface of your stepping stone. Take your mosaic design and press it firmly into the adhesive, ensuring all pieces are securely attached. Clean the edges and surface of your mosaic tiles with a damp sponge or cloth to remove any excess adhesive. Leave the tile adhesive to set fully before moving on to the next steps.
Step 6: Grout Your Mosaic
Mix the grout according to the instructions and spread it over the mosaic, filling the gaps between the pieces. Use a gloved hand or a rubber float to push the grout into the crevices.
Wipe away excess grout with a damp sponge before it dries completely. Allow the grout to set according to the package directions.
Step 7: Seal Your Stepping Stone
To protect your mosaic from the elements, apply a clear sealer once the grout has fully cured. This step will also give your stepping stone a polished finish and help prevent cracks.
Step 8: Place Your Stepping Stones
Find the perfect spot in your garden to showcase your new creation. Lay the stepping stones evenly, ensuring they’re level and stable for walking. If you’re creating a pathway, consider spacing them about a stride apart.
Tips for Success
Experiment with Materials: Don’t limit yourself to tiles or glass. Shells, stones, or even metal accents can add a unique touch.
Work Safely: Always wear gloves when handling grout and cement, and work in a well-ventilated area.
Weather Considerations: If you live in a cold climate, ensure your materials are frost-resistant to prevent cracking.
Have Fun: Mosaic stepping stones are a creative outlet. There’s no right or wrong way to design them, so let your imagination run wild!
댓글